Comments Off on Concrete Flooring Bathroom Floor Metallic Epoxy | Shower Floor Concrete Overlay Lake Ozark MO
Hey this is Rick with custom concrete design and Lake of the Ozarks Missouri this week we are in Barnet and we’re doing this interior bathroom.
Please subscribe to My YouTube Channel and uh like the video. If you like it, leave me a comment. Let me know what you think and hit that little bell, so you stay subscribed to my videos. Uh links are below to my facebook page and my website, where you can get more information.
All right see you guys on the next one.
Hope you Enjoy the pictures and Video MORE pictures located HERE!!
Call me for a FREE Estimate.
OR – You can Fill out this Convenient Contact form located HERE and I will Contact YOU!!
Thank you for Visiting My Website, come back again soon….
Comments Off on Decorative Concrete Condo Deck Tuscan Slate Texture Brown Antique Stain | Lake of the Ozarks MO
Okay this week we are in Greenview Missouri by the hurricane deck and Lake of the Ozarks MO, today were gonna start on a condo deck luckily for us its on the ground level and will be on the backside of the complex working on this screened in patio concrete has a few cracks nothing major the complex itself is fairly new so we have some great concrete to work with and another nice view of the lake.
So first step with this concrete is to prep it up meaning open up the cracks grind the surface which opens up the pores of the concrete to get it ready for our overlay. Once the cracks are opened up I’ll go ahead and fill them and then grind them down flush with the rest of the concrete, now the cracks are filled and ground down were just gonna go ahead and grind the rest of it cleaned it up the best we can with a shop vac and then pressure wash it.
The next step is putting down the base coat we are going with a dark chocolate color as our base, that goes down pretty quick so we went ahead and put down a second base coat.
Now were ready for our top coat which is can be a Tuscan Slate texture which will now give this concrete some depth and will create a nice design for the stains in the next step.
Right now we have to prep off the screen and the inside walls with paper, mix up our antique stain pour it into our pump up sprayer and spray this out randomly most likely I will need 2 maybe 3 coats I would say the third coat will be more of a highlight coat where I just kind of spray here and there to get the marbleization that I’m looking for.
Once I have the antique stain applied and the marbleization that I’m looking for I’ll let it dry and move on to the next step will be the next day and will come in and remove the paper get it cleaned up and ready for sealer, so I always come in and put two coats a sealer on the next day this allows the antique stain to fully dry and just give me that look them after. The first coat of sealer usually gets absorbed very quickly, however the second coat is what I like to call the money coat and it really allows the color to pop and gives it a great shine.
I would say that this Brown antique stain along with our Tuscan Slate has to be one of our more popular floors that we do our client was extremely happy with it and it brought in several more bids from those that live in that condo complex, enjoy the video on this post and the rest of the videos on my page under the video gallery tab be sure and check out the picture gallery as well and all the other information on this website.
Hope you Enjoy the pictures and Video MORE pictures located HERE!!
Call me for a FREE Estimate.
OR – You can Fill out this Convenient Contact form located HERE and I will Contact YOU!!
Thank you for Visiting my Website, come back again soon….
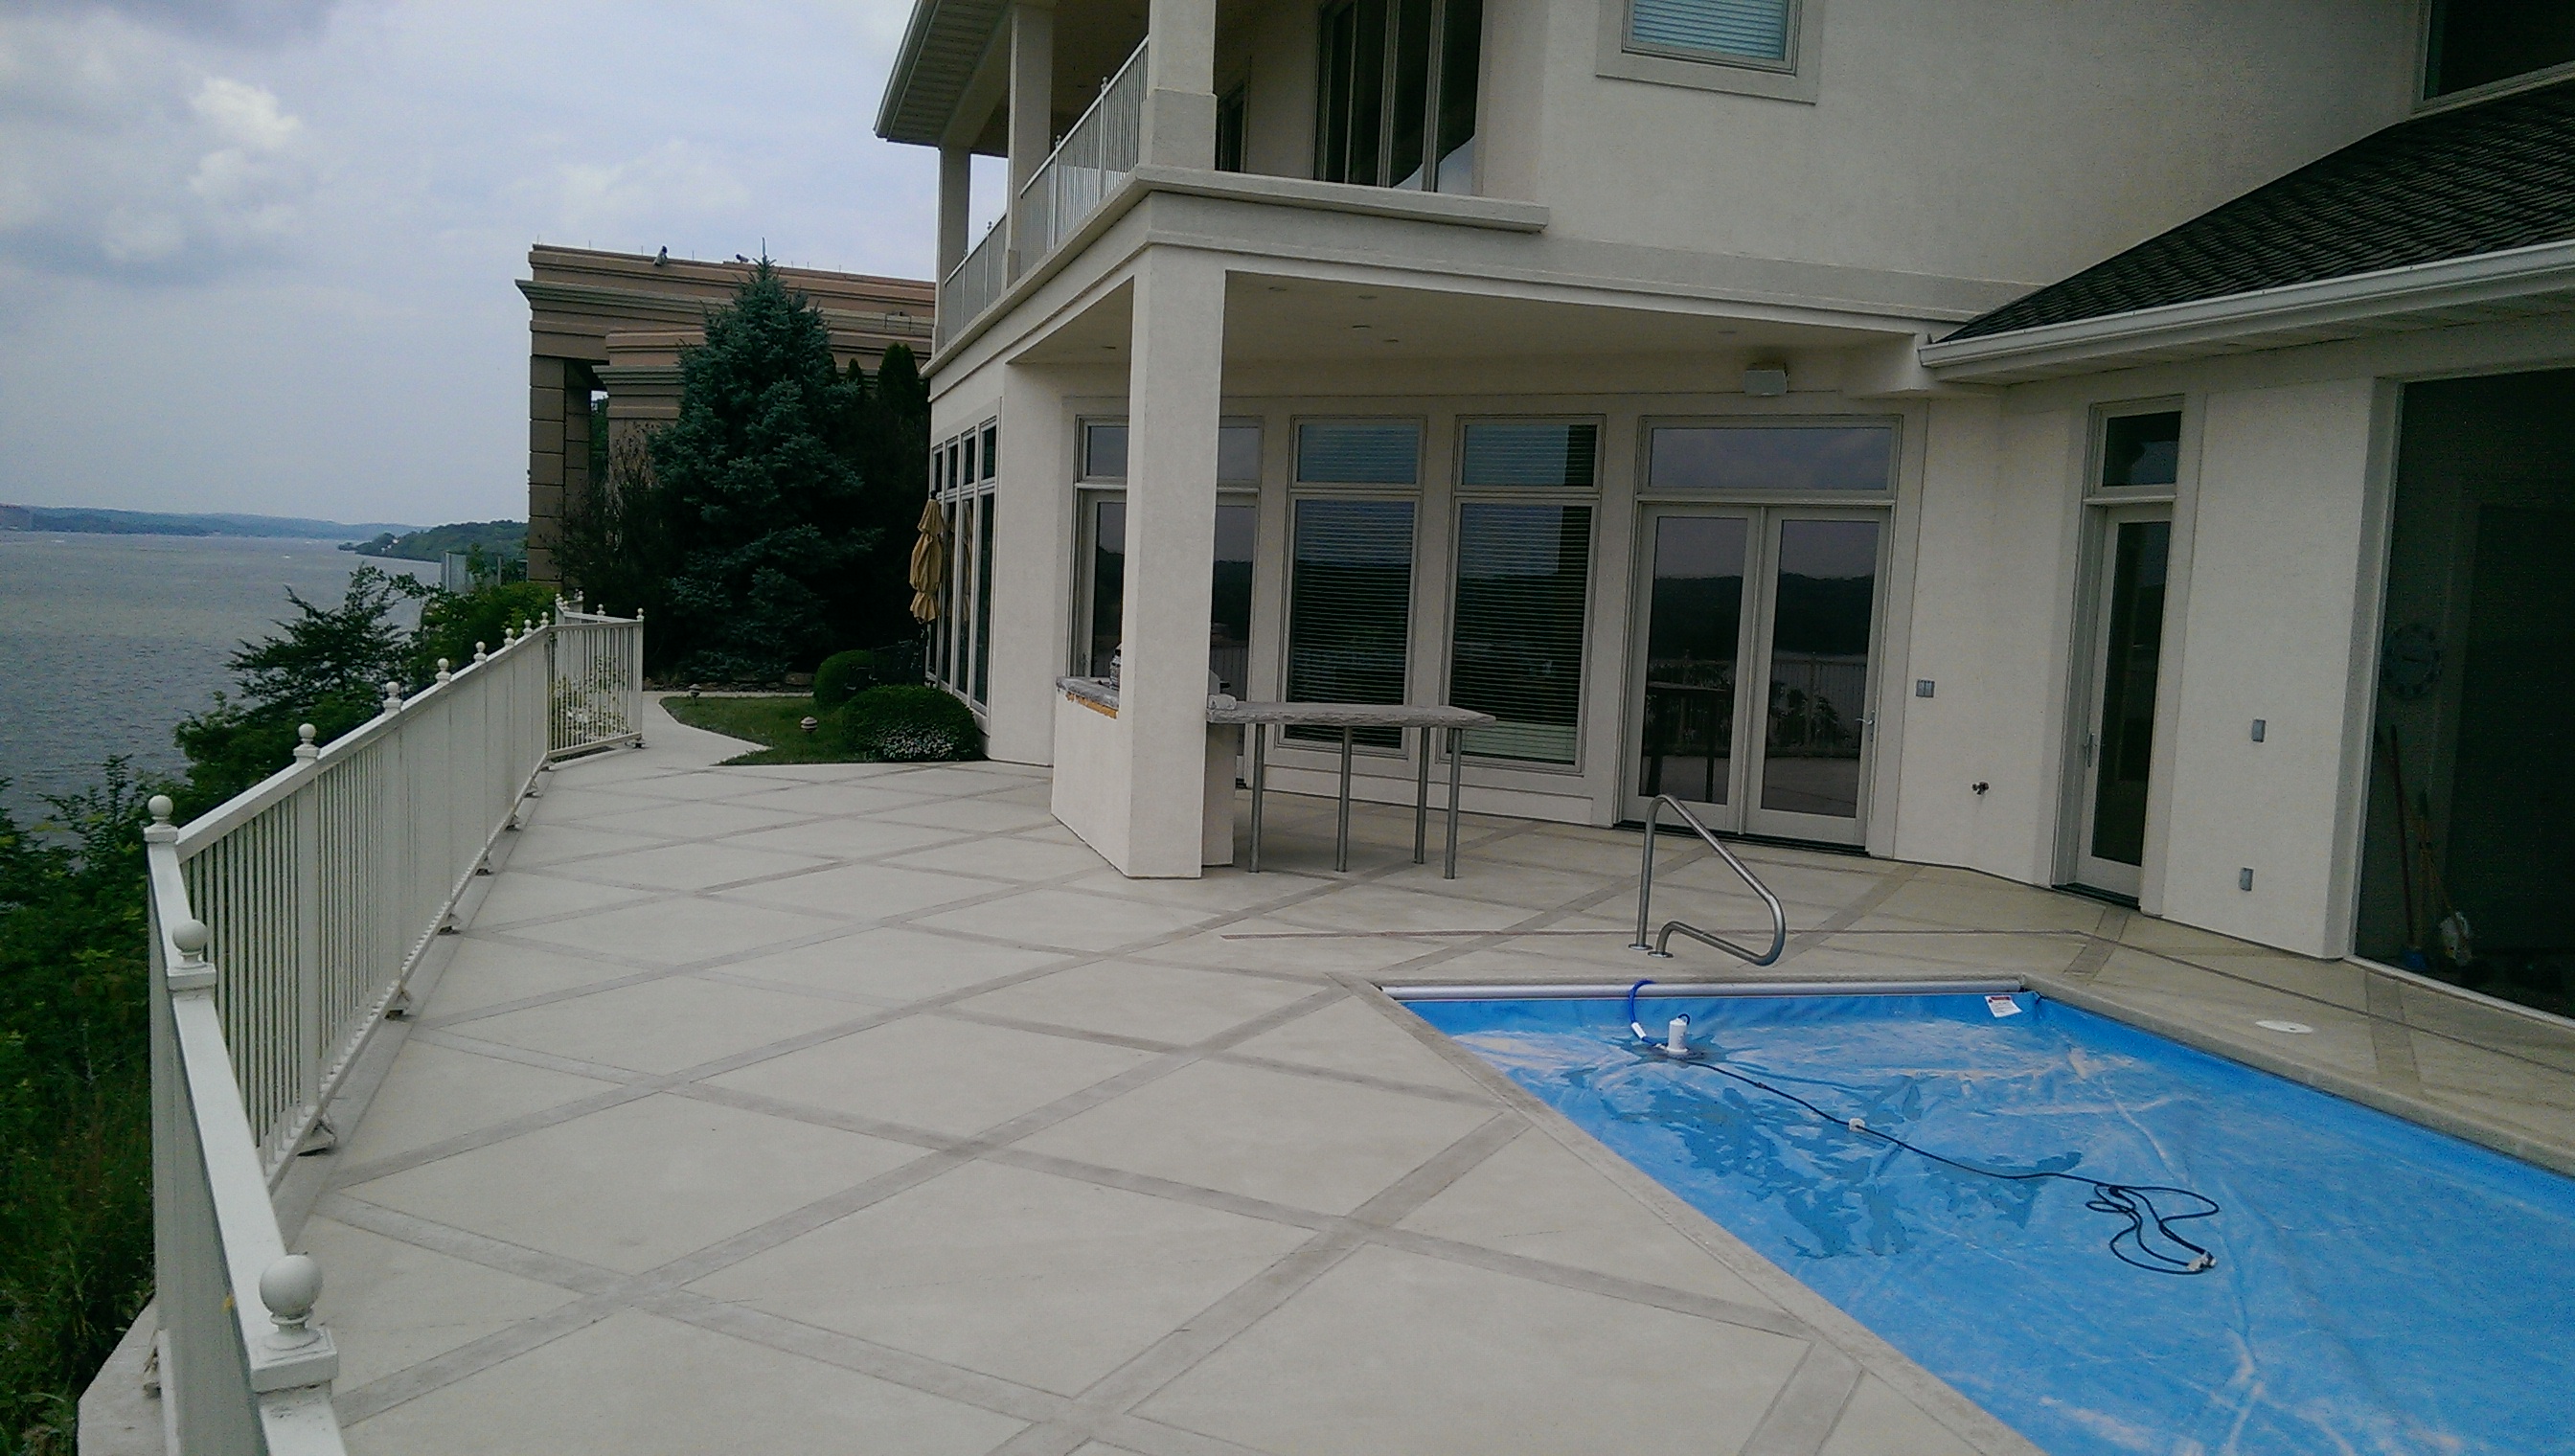
Comments Off on Decorative Concrete Overlay Coating Knockdown Finish on a Pool Deck | Lake Ozark, MO
On this pool decks we started our day by trimming back bushes grinding the walkway and grinding off the concrete overlay on the pool deck.
Once the concrete overlay was completely removed from the pool deck itself we had several cracks that needed repaired so we ground them out and filled them in. We also had one area that was a hole the size of a baseball so we cleaned it out and continued with our repair.
All the grinding and repairs were done we were finally ready to start our overlay on the entire surface started at the far end of the pool and just worked our way back with our base coat, once it was dry we came back through with a second base coat.
Now we have a fresh clean repaired concrete surface to work with, we measured everything out 4 x 4 squares set on a 45° pitch with a 5 inch border around each square and around the pool itself and we measured out a 10 inch border for the outside perimeter of the pool deck, once we had all our measurements done and had our marks down we continued with our fiber tape to lay down the pattern.
Once the pattern was down it was time for more colored concrete, I decided to do the all the borders first so that meant we had to paper off the 4 x 4 squares from any concrete overspray. Now the borders are sprayed and the only thing we could do was let everything dry overnight.
The next step was to paper off the borders so that we could spray the 4 x 4 squares the lighter color of the two colors, basically what we were trying to go for here and you can see from the pictures and the video is keeping everything overall very light with the color of the house and keeping the borders a few shades darker to set off our pattern and to also complement the trim of the house. After the squares were sprayed we pulled the paper off of our borders and then we also removed our fiber tape that separated the square and the border all of this reveals our pattern our colors and now it’s a matter of getting everything cleaned up and getting it sealed.
The whole process from start to finish took us about three weeks to complete, the reason it took a little bit longer on this project is simply because we had a lot of rain mother nature can be relentless sometimes, but the job got done it turned out great our client was very happy.
Hope you Enjoy the pictures and Video MORE pictures located HERE!!
Call me for a FREE Estimate.
OR – You can Fill out this Convenient Contact form located HERE and I will Contact YOU!!
Thank you for Visiting my Website, come back again soon….
Comments Off on Decorative Concrete Acid Stained Coating on a Basement Floor w/Epoxy Seal Coat | Lake Ozark MO
Okay so, this week we went to Osage Beach Missouri for our next project we had no idea what the floor condition was other than the age of the floor the reason being it had carpet installed when they built the home, but what we did know about this floor is anytime it has carpet it’s gonna have glue and tack strips with that being said this floor had both so I knew we would have some glue to remove and tack strip holes to repair and of course concrete does crack so there were a few those as well.
We went in we pulled all the carpet, all the tack strips, and discovered several cracks, so we opened up the cracks to repair them and did the same with the tack strip holes once all the repairs were done we just basically ground everything down flush with the concrete all of our repairs that is and removed the carpet glue now we have a fresh surface or clean canvas to work from.
Click HERE to see the Full Album from start to finish…
Watch the video below and you’ll see almost everything we did to that floor, so the next steps were to start our base coat which on this floor we just started with two white base coats no color 100% coverage, after that our next step was to add our texture which is a Tuscan Slate this takes a lot more time and a lot more skill, but it’s easy once you understand how to do it… This coat goes down at about 85% coverage.
So after the textures down we want to add are ACID STAINS, but obviously first we have to prep everything off with paper because we do spray our acid stains, this floor is getting two colors one is an Umber color and the other is a Brown Acid Stain, most of the time I never get this the first time, usually it takes 2 to 3 coats of acid stain per color to get the right marbling and correct shade I’m looking for.
Now that the Acid Stains are down we just gotta let it do its thing and come back later and scrub it all up and rinse it with ammonia and water shop vac it and let it sit at least 24 hours before we come back and put our CLEAR EPOXY over the top, next we put a UV protection coat over the top of the clear epoxy and this project is complete!!
Hope you Enjoy the pictures and Video MORE pictures located HERE!!
Call me for a FREE Estimate.
OR – You can Fill out this Convenient Contact form located HERE and I will Contact YOU!!
Thank you for Visiting my Website, come back again soon….
Comments Off on Knockdown Texture Upper Deck Condo | Lake of the Ozarks, MO
This week we’re at a condo complex in Greenview Missouri, this is an upper suspended deck with a gorgeous view, the homeowner wanted to do a solid seamless knockdown finish in a chocolate color.
We begin our work morning like we do most every job we grind the surface with our walk behind and hand grinders open up any cracks and repair, and then grind the repairs flush. Once the surface has been thoroughly profiled we get it all cleaned up and ready for concrete.
The next step of the process is to lay out a base coat of colored concrete once that’s down we add a second coat, that’s pretty much all we did the first two days.
Our third day we came in and prepped all of the walls, glass, and railing… Set up our mixing station and sprayed our concrete with our hopper gun, then knocked it down with our trowel…. Simple process.
Today we came back pulled down all the paper knocked down all the concrete burrs, cleaned it up real well and put on two coats of our premium sealer.
Overall this is a very simple process and does not take us very long.
Hope you Enjoy the pictures and Video MORE pictures located HERE!!
Call me for a FREE Estimate.
OR – You can Fill out this Convenient Contact form located HERE and I will Contact YOU!!
Thank you for Visiting my Website, come back again soon….